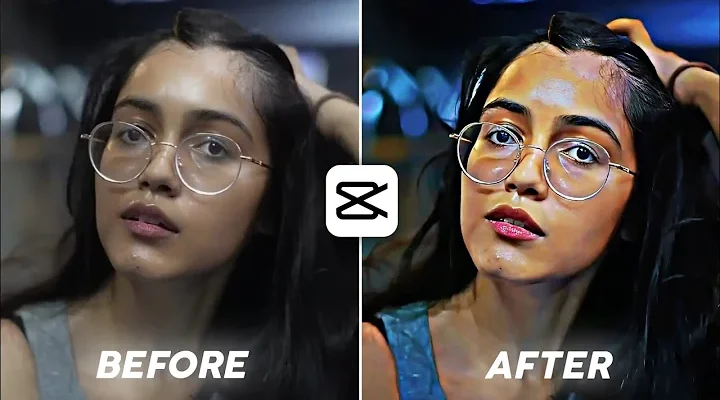
How to Add HDR CC Effect and Color Grading in Instagram Reels
Instagram Reels are no longer just about short clips – viewers today expect high-quality, cinematic-style content. One of the best ways to enhance your Reels is by adding HDR CC effects, 4K video quality, and professional color grading. These edits can make your videos look sharper, more vibrant, and stand out on Instagram.
In this tutorial, we’ll walk through the process of adding HDR CC effects, improving sharpness, and applying color grading using the Alight Motion app. By the end, you’ll know exactly how to transform a simple video into a high-quality reel that looks professional.
Why Use HDR CC Effect in Reels?
- Enhances video quality – brings out details in highlights and shadows.
- Makes Reels look professional – similar to cinematic edits you see on Instagram.
- Boosts engagement – better visuals can attract more likes, shares, and followers.
Step 1: Open Alight Motion and Import Your Video
Download and open the Alight Motion app. Create a new project (9:16 ratio for Instagram Reels) and import your video. This will be the base clip where you’ll apply all the effects.
Step 2: Add HDR Effect
Follow these steps to apply HDR CC:
- Create a new rectangle shape and expand it to full screen.
- Apply Copy Background and Gaussian Blur effects.
- Set Gaussian Blur strength to around 200%.
- Adjust Exposure to -2 for a cinematic dark tone.
- Change Blending Mode to Difference for an HDR-like effect.
Step 3: Apply Gradient Overlay
To enhance colors, add a Gradient Overlay. Set the top color to a light white tone and the bottom to a darker white shade. Adjust X and Y offset values for proper blending.
Step 4: Color Grading and Sharpening
Now it’s time to make your video pop:
- Increase Saturation to around +10%.
- Add Vibrance for a richer look.
- Apply Sharpen effect and keep it around 1.0 – this will improve video clarity.
Step 5: Add Vignette and Directional Blur
To make your video more cinematic, add a Vignette effect (Size: 100%, Roundness: 0, Feather: ~0.65). Then apply a light Directional Blur for smoother transitions.
Step 6: Add Flicker and Final Adjustments
For a stylish touch:
- Add a Flicker effect with Frequency: 10% and Strength: 1%.
- Adjust blending modes like Overlay and Screen for depth.
- Set opacity to around 50% for natural finishing.
Step 7: Export in 4K Quality
Once satisfied, export your video in 4K resolution. This ensures the highest quality when uploading to Instagram. If you want to explore more editing resources, check out Adobe Premiere Pro or Final Cut Pro for advanced workflows.
Before & After HDR Effect
After applying HDR CC and color grading, you’ll notice:
- Sharper details in your video
- More vibrant colors
- A cinematic, professional look
Final Thoughts
Adding HDR CC effects and color grading is one of the best ways to make your Instagram Reels stand out. With the help of Alight Motion, you don’t need expensive software – just your mobile phone is enough to create professional-quality edits.
If you found this tutorial helpful, make sure to share it with your friends and check out other editing guides online. For more advanced tips, you can explore resources like Color Grading Tips and Videomaker.
Now it’s your turn – try adding these effects to your next Reel and see how much better your videos perform on Instagram!


